Overview
Windows
Adobe Acrobat Reader DC is installed on all ILR issued Windows systems. Adobe Acrobat Reader DC enables viewing of PDF files. You will have the ability to convert Word and other document files to PDF's.
Mac
Adobe Acrobat Reader DC is available within the Self Service applicaton to individuals with Macs. To access Self Service, at the desktop, select the Go menu -> Applications -> Self Service 
**NOTE** If the Go menu item is not visible, click once on the desktop to make Go appear (all programs should be minimized or closed beforehand). Go will appear at the top left hand side of the screen.
Additional Information & Requirements
For some, viewing PDF's and converting documents to PDF’s will not be enough. Some individuals will need more functionality. If you need to edit PDF’s, combine multiple PDF’s into one file, or work with digital signatures, you may need Adobe Acrobat Professional or Adobe Acrobat Pro DC. For those who require additional functionality, please submit an IT Service Request to Tech Services.
Below are instructions on how to convert a document to a PDF file on Windows and Mac operating systems.
Windows
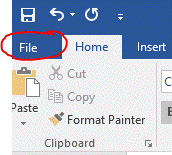
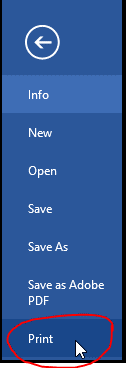
1. File Menu
Within Word or the file you would like to convert to a PDF, go to File -> Print.
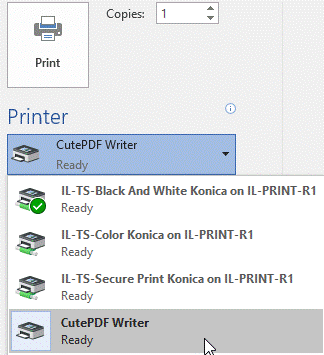
2. Select CutePDF Writer
Select the drop down menu -> select CutePDF Writer.
***Alternative***
If you have a problem with converting files using the CutePDF Writer, go to File -> Print and select Microsoft Print to PDF. Microsoft Print to PDF is another way to convert files to PDF’s.
3. Print
Choose Print.

4. Name File
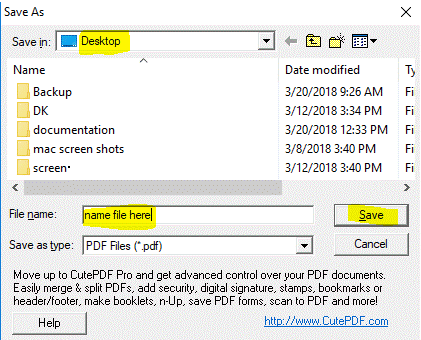
A default file name will appear next to File name. You can keep the default name or change it to the right of File name. Choose Save. Also, when the file is converted and saved, the file won’t open in front of you after the document has been converted to a PDF. You will need to navigate to the location of where the file saved and open it manually. Before saving, make a mental note of where the file will save.
5. File Converted & Saved
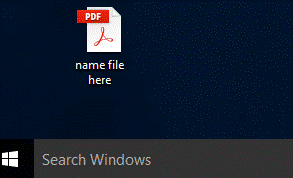
Locate the file after saving. The default save location is Documents. In this example, the PDF was converted and saved to the desktop.
Mac
1. File Menu
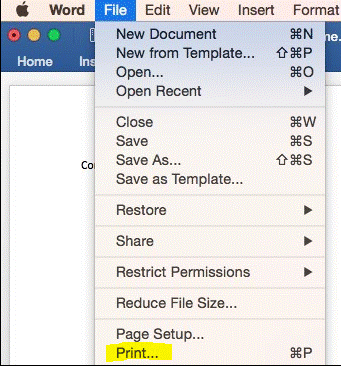
Within Word or the file you would like to convert to a PDF, go to File -> Print.
2. Save as PDF
Within the Print dialog box, select the drop down box to the right of the ? and choose Save as PDF -> Print.

3. Name & Save
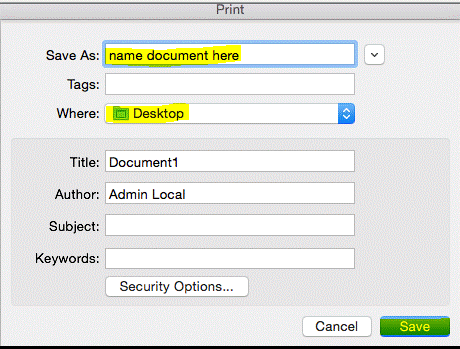
A second Print dialog box will appear. Either keep the default file name under Save As or change the name. The location of where the file will save is indicated under Where. Use the drop down box to the right of Where to change the location the file will be saved. Click Save.
4. Locate and Open File
Navigate/browse to the location indicated under Where when the document was saved and open the file.
